11

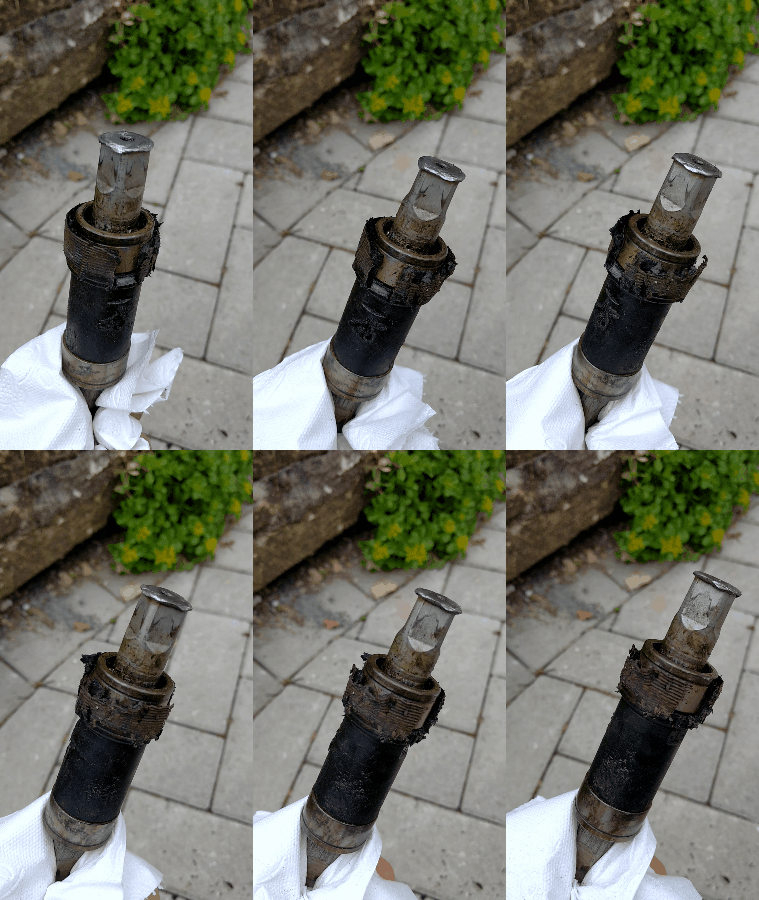
I have a 2 frames with FAG bottom brackets (can't tell the exact model from the outside, but something like this): enter image description here

(datasheet here) in various states of destruction

Bike 1

I didn't have the tool so I tried turning the cups with a wrench, completely stripping off the notches and then tried to hammer as much of the plastic out with a screwdriver, but I'm not getting anywhere. One suggestion I've read is heating the spindle in the hope that the plastic can be easily removed, so I put a soldering iron into it, without much luck (heat doesn't really dissipate from the spindle.

Bike 2

I now have a proper tool that fits the notches, but it slipped during turning and partially also stripped the notches (plastic vs. metal … surprise). I managed to get one cup turning – I thought – but only the outward facing part came off, with the inner tubing still inside the frame.

What other methods could be used to remove the bottom brackets? It's important that I save the frame; the brackets can go to hell for all I care.

10
  • 1
    The polyamide of these FAG bracket shells is notorious for degrading. German bike mechanics often have tricks to get the out quickly, but also tend to guard them as trade secrets. My guess is always a combination of cutting, chiseling, heating and pushing the BB out. I did it last Christmas meself: took hours. Might write answer later today.
    – gschenk
    Commented May 31, 2018 at 13:53
  • 2
    What does not help: removing the spindle and trying to cut through the cartridge shell. Heating the spindle. Beating it out with a mallet.
    – gschenk
    Commented May 31, 2018 at 14:00
  • 1
    The bearing races are in the shell and it is therefore hardened. This is not just a surface hardening but goes quite a long way through. Hardened steel saw blades are no harder than this. You will need expensive saw blades. Or better some way to grind through it with a corundum coated wire or so. It still is a tedious process since you don't have much room for your saw and will have a tough time to get a power tool to fit in. There are I think easier ways.
    – gschenk
    Commented May 31, 2018 at 23:04
  • 1
    These bottom brackets are so abundant for a reason. They are simply very good everyday bikes. They run smooth and are reliable for ages. What is more, they continue to work just well enough for everyday bikes when they are already failing in parts. Nylon cups are used as they are tolerant to bad threads and bad thread alignment.
    – gschenk
    Commented Jun 3, 2018 at 10:01
  • 2
    @Batman the point of these BB is that one would usually not remove them. They run without any maintenance whatsoever. Often they dont run smooth anymore, but will keep turning for another decade or two. Besides, it is a recent thing that Shimano BB are on the market and are available. Already in 1983 1.5 million of these FAG BB were manufactured. They forced cup and cone BB out of the mid price market segment. For a time there were either BSO too cheap for good BBs or road bikes with French/Italian group set bearings.
    – gschenk
    Commented Jun 3, 2018 at 21:06

6 Answers 6

15
+250

FAG bottom brackets (BB) with plastic mounting rings are very common in Germany. The cartridge bottom bracket is really good and resilient, however the polyamide (PA) mounting rings are horrible.

As you found out there is a tool to turn the splined outside (rosette shaped). It is inexpensive and easy to get in Germany (< 10EUR). However, unscrewing the PA mounting rings often fails. The polymer material conforms to the thread and all its imperfections and thus has too much friction in the thread. The bulk of the material is not strong enough to transfer the momenta needed to overcome this. As a consequence it is very easy to simply twist off the entire outer part of the cover including the splines or mangle the splines.

I had to remove such brackets before. In one case I could remove the mounting ring on one side of the bracket with the tool. It is easy then to take out the cartridge and get out the other shell. If one side fails, be very careful with the other one. Try to use penetrating oil, use plenty of it and give it a lot of time to enter. Make sure you turn the correct way.

both mounting rings stuck

failures

Recently I had a bike where both mounting rings were stuck*. In my case the mounting rings were pressed in. My frame had no threads whatsoever in the bottom bracket shell. I will briefly describe what I did and then continue with how I think it could be done better. Starting with my entirely futile first attempts.

  1. I supported the frame well on wooden blocks and used a mallet to hit the spindle. This had no effect whatsoever.

  2. I used a clever arrangements of a vise and wooden blocks to push the spindle.

  3. I removed the outer part of the mounting ring, which serves as dust cover, with a woodworking chisel. I removed more PA material to form a 45 degree face until the outer edge of the cartridge shell was accessible. I selected a deep socket with the same outside diameter as the cartridge. A short length of any pipe would do. I placed it over the cartridge and tried above two methods.

  4. I repeated the same on the other side.

  5. I drenched all gaps with penetrating oil, let it stand overnight, warmed everything with a heat gun, and tried approach 3. from both sides.

None of above attempts moved the BB a bit. I removed the dust covers from the cartridge, removed the bearing balls, and took out the spindle. This left me with the empty cartridge shell, held by the remnants of the PA mounting rings, stuck in my frame's BB shell.

  1. I tried to saw through the shell of the cartridge by inserting a saw blade and mounting it in a hacksaw.
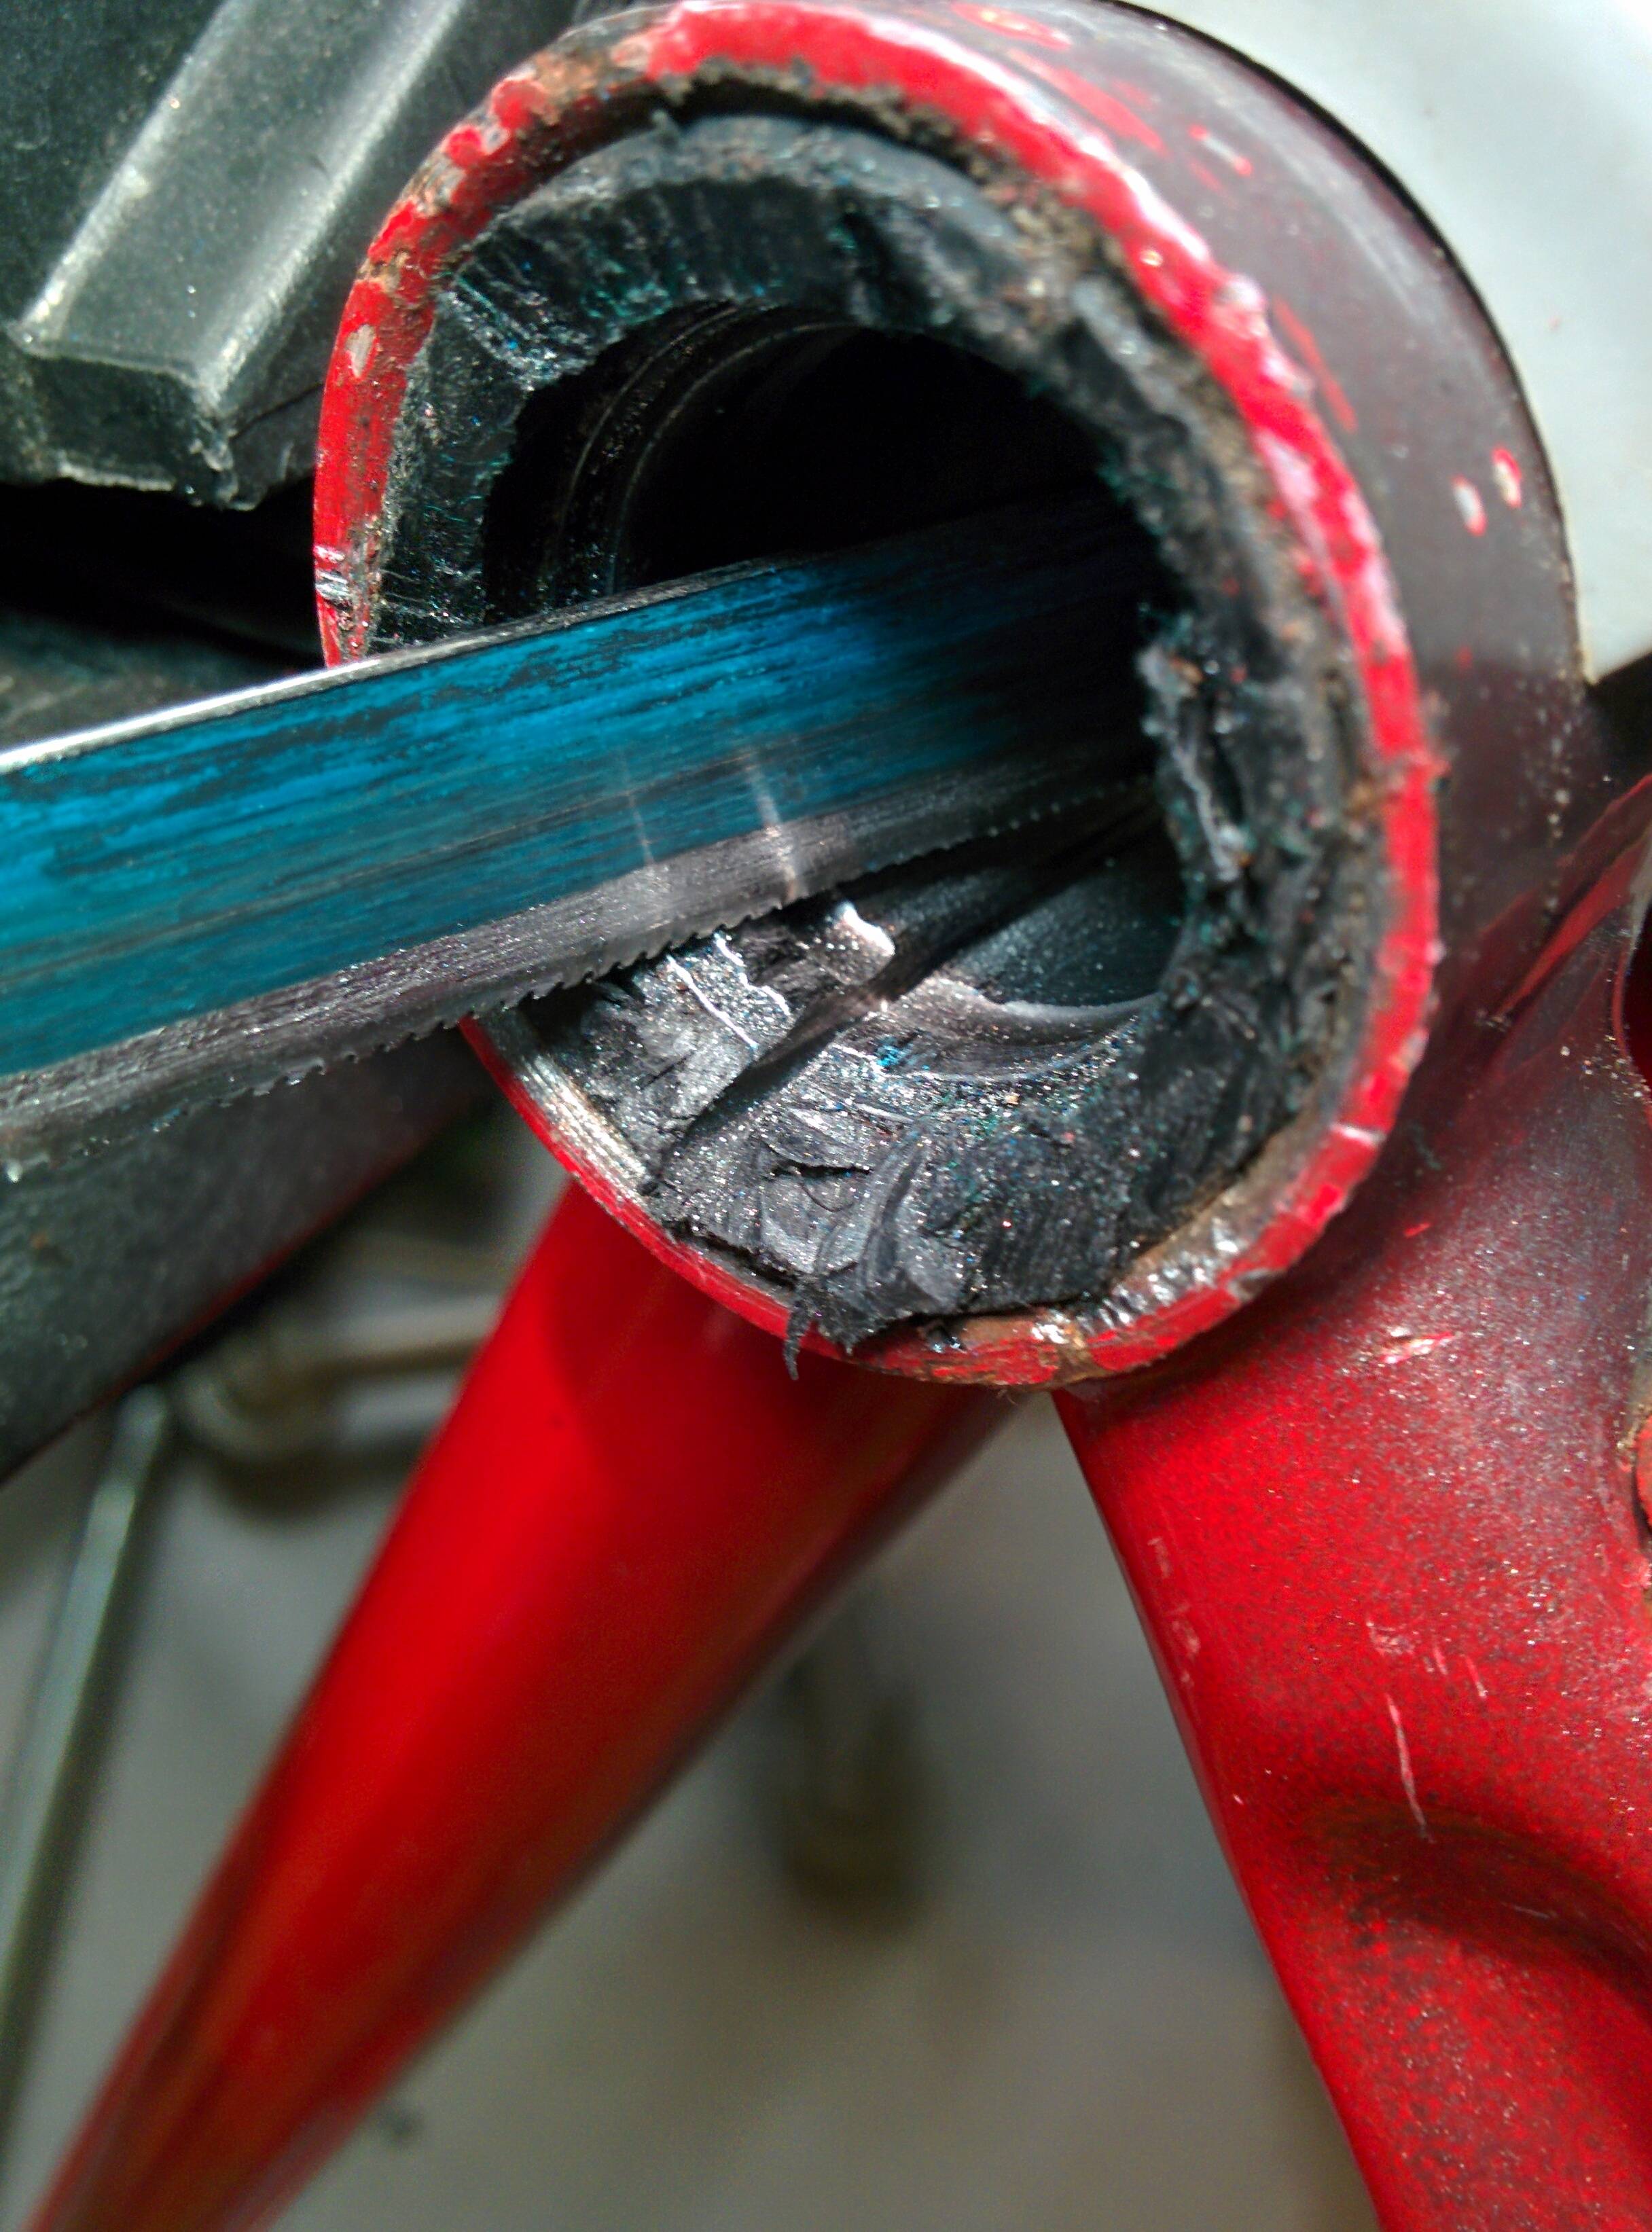
saw blade inside the empty cartridge shell of a FAG bottom bracket

After wasting two mediocre quality saw blades and lots of toil I gave up. The races of the BB bearings are directly in the shell of the cartridge. The steel around it is hardened through. It is not just surface hardening. I did not want to invest into a diamond coated saw blade. Nor did I have any means to grind through the shell (which would be more than tedious without a power tool that could access the narrow apertures. Don't let the deep cut in the picture mislead you, the cut is only deep where the steel was not hardened.

success

What finally led to success was the following approach:

I chiselled off all of the PA 6 material down to the edge of the cartridge. I applied plenty of penetrating oil in a widened gap that worked as a funnel. Then I heated the cartridge shell with an excellent heat gun and a small propane torch. I used a socket (see 3) as punch and a wood working clamp to press out the cartridge, changing sides repeatedly.

After a few iterations this led to the plastic of the mouting rings to move out a little. I chiselled that off again. And repeated the procedure. Within about 20 minutes I was able to remove all of the cartridge.
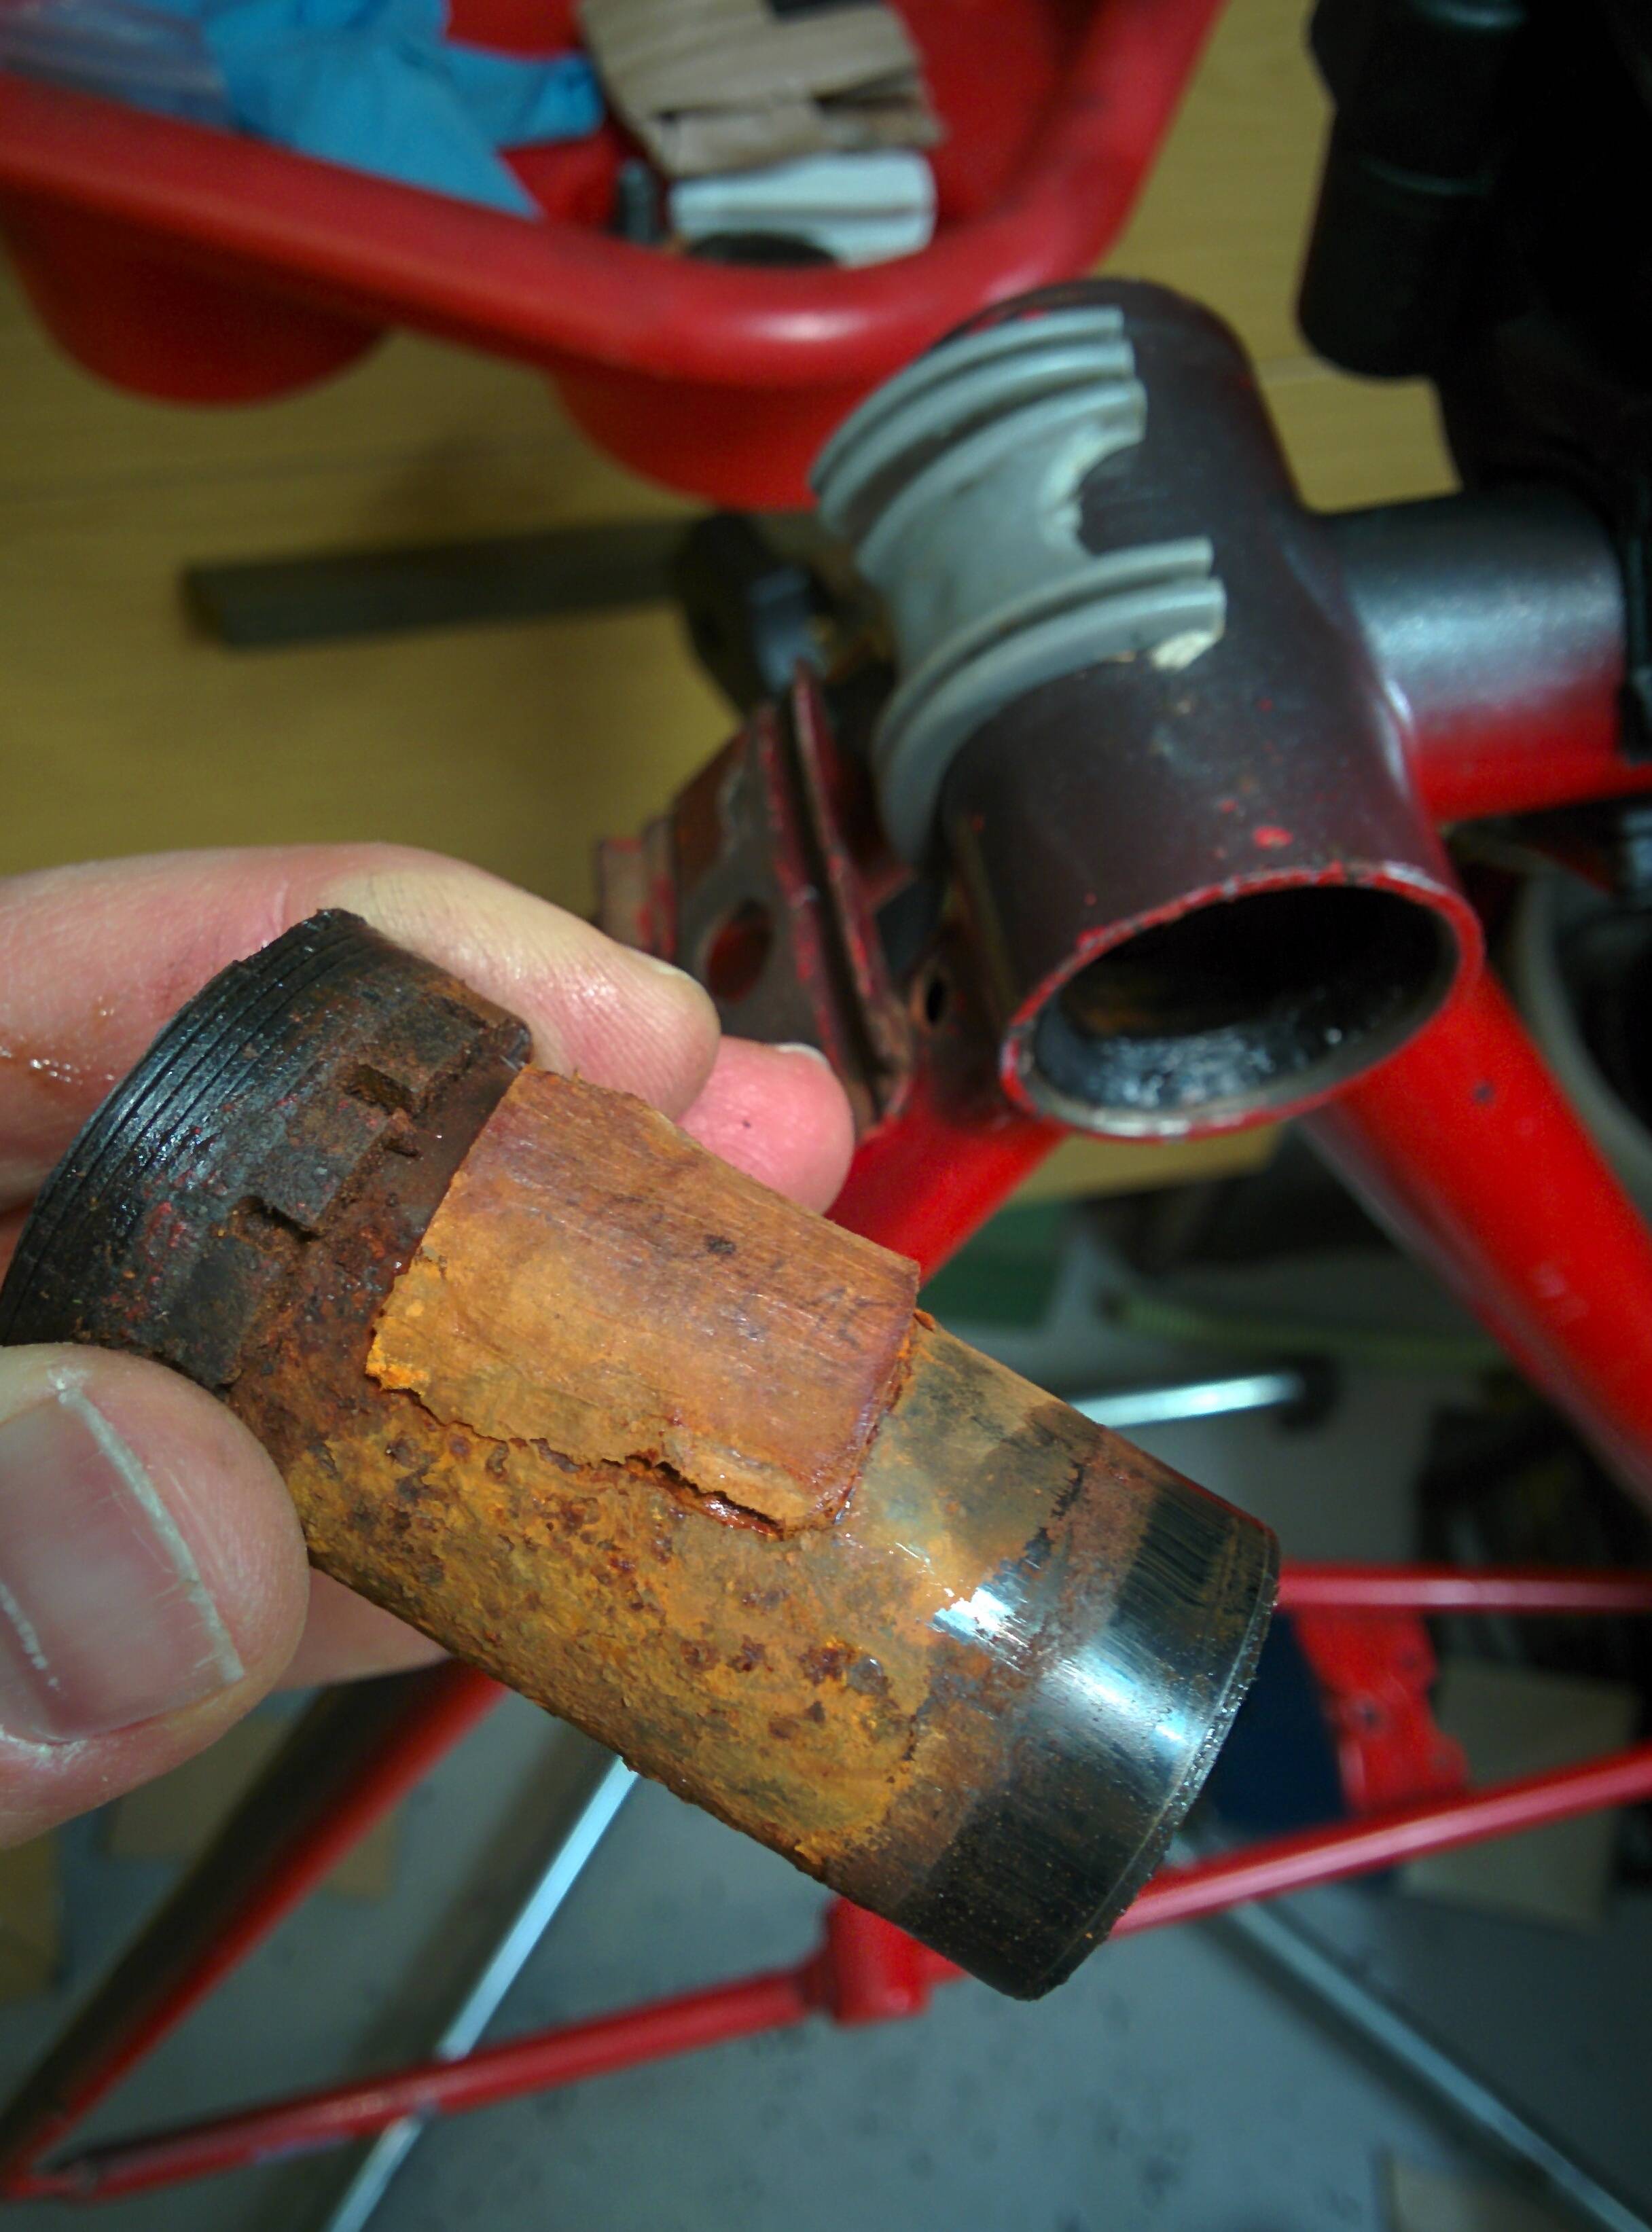
This is what success looks like: FAG bottom bracket removed

method

Based on my experience I suggest the following approach.

A. cut away all of the PA mounting rings that stands out of the BB shell. In particular remove the PA parts that cover the cartridge.

B. remove dust covers from the cartridge bearings. Then remove bearing balls and spindle. Clean the inner part of the cartridge shell.

C. chisel away as much of the PA mounting rings as you can. In particular enough to form a depression that functions as a funnel to channel penetrating oil into the gap between PA mounting rings and cartridge. Fill it up with penetrating oil and let it all seep in.

D. Find an appropriate piston, eg a socket, and press out the cartridge with a vise or clamps. Excellent support on the other side is crucial here. Otherwise you will not be able to apply enough force (without braking the frame).

Repeat D alternating sides. This may wiggle out the cartridge. Apply heat to the empty cartridge shell. The melting point of PA6 is 220 C; the PA of the mounting rings might get soft at a similar temperature. Although, a much lower temperature might suffice if enough force is applied. Be careful not to set the penetrating oil on fire!

5
  • Nice work and well documented! Did you consider removing the screw holding the under-bb plastic thing on, and getting some penetrating oil in that way? Hot-air guns are surprisingly handy tools.
    – Criggie
    Commented Jun 1, 2018 at 4:02
  • The plastic cable guide was not attached with a screw but pushed in. I had to push it out from the inside. I should have tried to break it and drill out the bit that stayed in the frame to access the BB shell, but I did not.
    – gschenk
    Commented Jun 1, 2018 at 9:05
  • +250 for that answer!
    – Criggie
    Commented Jun 3, 2018 at 22:34
  • Did you consider using a bearing puller? Commented Apr 13, 2019 at 0:47
  • I do not have one. It need to be an extraordinarily big one, I suppose.
    – gschenk
    Commented Apr 13, 2019 at 0:53
5

I hope you know that in BSC threading the drive side has a reverse thread (you unscrew it clockwise).

In fact I'm facing a similar problem and I'm planning on the following approach:

  1. a. use a hacksaw to cut the cup flange off (sawing next to the frame) of the non-drive side
  2. b. you can also use "hot knife" (a blade heated up on the gas flame) to cut the flange off. Hot knife gives you more freedom when shaping the incision, you're almost guaranteed to remove all material that is holding BB cartridge in place.
  3. remove the spindle with the bearings (nylon cups are usually holding the cartridge bearings)
  4. gently using an utility knive to remove a section of a cup (cutting perpendicular to the thread windings) or applying the soldering iron to melt the cup thread
  5. remove the drive side using this method of RJ The Bike Guy.
5
  • Yes, I know about the threading, but it didn't help. I could even turn the cup in both directions, but it doesn't move out which leads me to believe it may just be pressed in instead of screwed. Since the outer parts of the cup are now gone (is that the flange? not my first language), I couldn't use RJ's method even if they were I guess.
    – oarfish
    Commented May 30, 2018 at 14:58
  • Do I understand correctly that you're proposing a heated knife for removing also the inside parts of the cups? Or how would I get to the spindle?
    – oarfish
    Commented May 30, 2018 at 15:28
  • If you can turn the cups but they don't come out either the thread is gone or they are pressed indeed. Some Dutch utility bikes (roadsters) have threadless bottom bracket. Since your cups are turning freely try gently tapping on the BB spindle with a rubber mallet and see if they come out.
    – Mike
    Commented May 30, 2018 at 20:48
  • Unfortunately, the spindle doesn't move when struck with hammer. I'm wondering if some chemical can be used to dissolve this kind of plastic.
    – oarfish
    Commented May 31, 2018 at 14:34
  • Try "hot knife" then (glowing-hot piece of metal) to cut off the flange and free the spindle and cartridge bearings. And you can use the same method to cut through the remainings of the cups stuck in the BB shell. For dissolving nylon (provided that your cups are nylon) I've found this gunsmiths' forum discussion: arstechnica.com/civis/viewtopic.php?f=23&t=70409 - I wouldn't go that way.
    – Mike
    Commented May 31, 2018 at 14:46
5

I have now also successfully removed the FAG bracket from one of the frames and I'm now rather confident it can be done like this:

  1. Remove the flanges (just try to unscrew them, they'll rip right off)
  2. With a chisel or a flat-tipped and expendable screwdriver remove as much of the material from the inside as you can, but try to pry it away at the cartridge and steer clear of the threads (I actually drilled holes into the plastic with an electric drill, this also helps remove a lot of the plastic)
  3. With a soldering iron use the thinnest tip you have to melt and pry away as much of the plastic as possible
  4. With a hammer, punch the spindle towards the left and see if something moves, if not, remove more material
  5. If the bracket moves out to the left but then gets stuck, punch it out the right.

This finally removed by patient, but the threads took some damage. I think with a thread chaser they might be restored sufficiently to take a new bracket, but I'll need something to test it.

videotogif_2018.06.03_10.35.10.gif

3
  • A "hot knife" might be better than a soldering iron. I have a gas soldering iron that has one as a changeable tip, and it works great for things like this.
    – Criggie
    Commented Jun 3, 2018 at 0:00
  • @oarfish it is an excellent answer to your question. Would you be so kind to accept it as answer to your question? Accepting your own answer is perfectly fine. After all, no other answer may claim that there is a proof it solves your problem.
    – gschenk
    Commented Jun 3, 2018 at 21:18
  • @gschenk I'm hesitant to accept any particular answer since the applicability to future problems can be different. Also I cannot be sure what part of my algorithm actually made a difference (was drilling holes necessary?).
    – oarfish
    Commented Jun 4, 2018 at 20:12
4

@Mike's approach of cutting the notched flanges off might work, but I don't think it's guaranteed that the bracket body will then come out.

You obviously have a wrench that is large enough to fit on the cup notched flanges. I would use a coarse file to cut parallel flats on the flange, enabling the wrench to engage the flanges enough to unscrew them.

Once you have the bracket body out you can address the threaded part of the flange still in the frame. You could try to make an axial cut through the threaded piece with a disposable blade knife (or the soldering iron, but be careful of your paint), then prise them out.

3
  • I'm afraid that the force that is holding the cup in place is greater than the deformation force of the nylon cup. Therefore your method may work, but it may also strip the cup further. I've just came up with an idea of using a hot knife instead of hacksaw. This way you can go deeper into the BB shell and remove all the material that is holding the cartridge in place.
    – Mike
    Commented May 30, 2018 at 13:33
  • I actually have the proper tool to engage the notches, reshaping the flange to fit my wrench would not provide a stronger grip, would it?
    – oarfish
    Commented May 30, 2018 at 15:05
  • @oarfish I meant for flanges where you have already destroyed the notches Commented May 30, 2018 at 15:11
3

Needed to remove the plastic bottom bracket retaining rings on the SKF bottom bracket on my Moulton APB T21 and the workshop designed tool just skidded off. Sprayed the retaining rings with WD40 silicone spray several times over the course of 5 days. Made sure I sprayed inside around the spindle and around the outside. There is a lip on the inside of the ring and the spray needs to creep in and back under the ring before it gets anywhere near the thread. I leaned the bike over to alternate sides to help the spray creep in. I then filled a plastic bag with water that had preformed pockets in to make ice balls for drinks etc and froze them.

I then wrapped the bag of frozen ice balls whilst still in the bag.....around the left hand side retaining ring using a tea towel to tie them in place and left them for about 15 minutes. I suppose the longer the better. Then used my stilsons to undo the ring.......it took a fair bit of pressure but it worked, felt quite smug really !!!!

Then leaned the bike over and sprayed more WD40 silicone spray down inside the bottom bracket shell and will let it soak for at least 24hrs before giving it the ice treatment

3

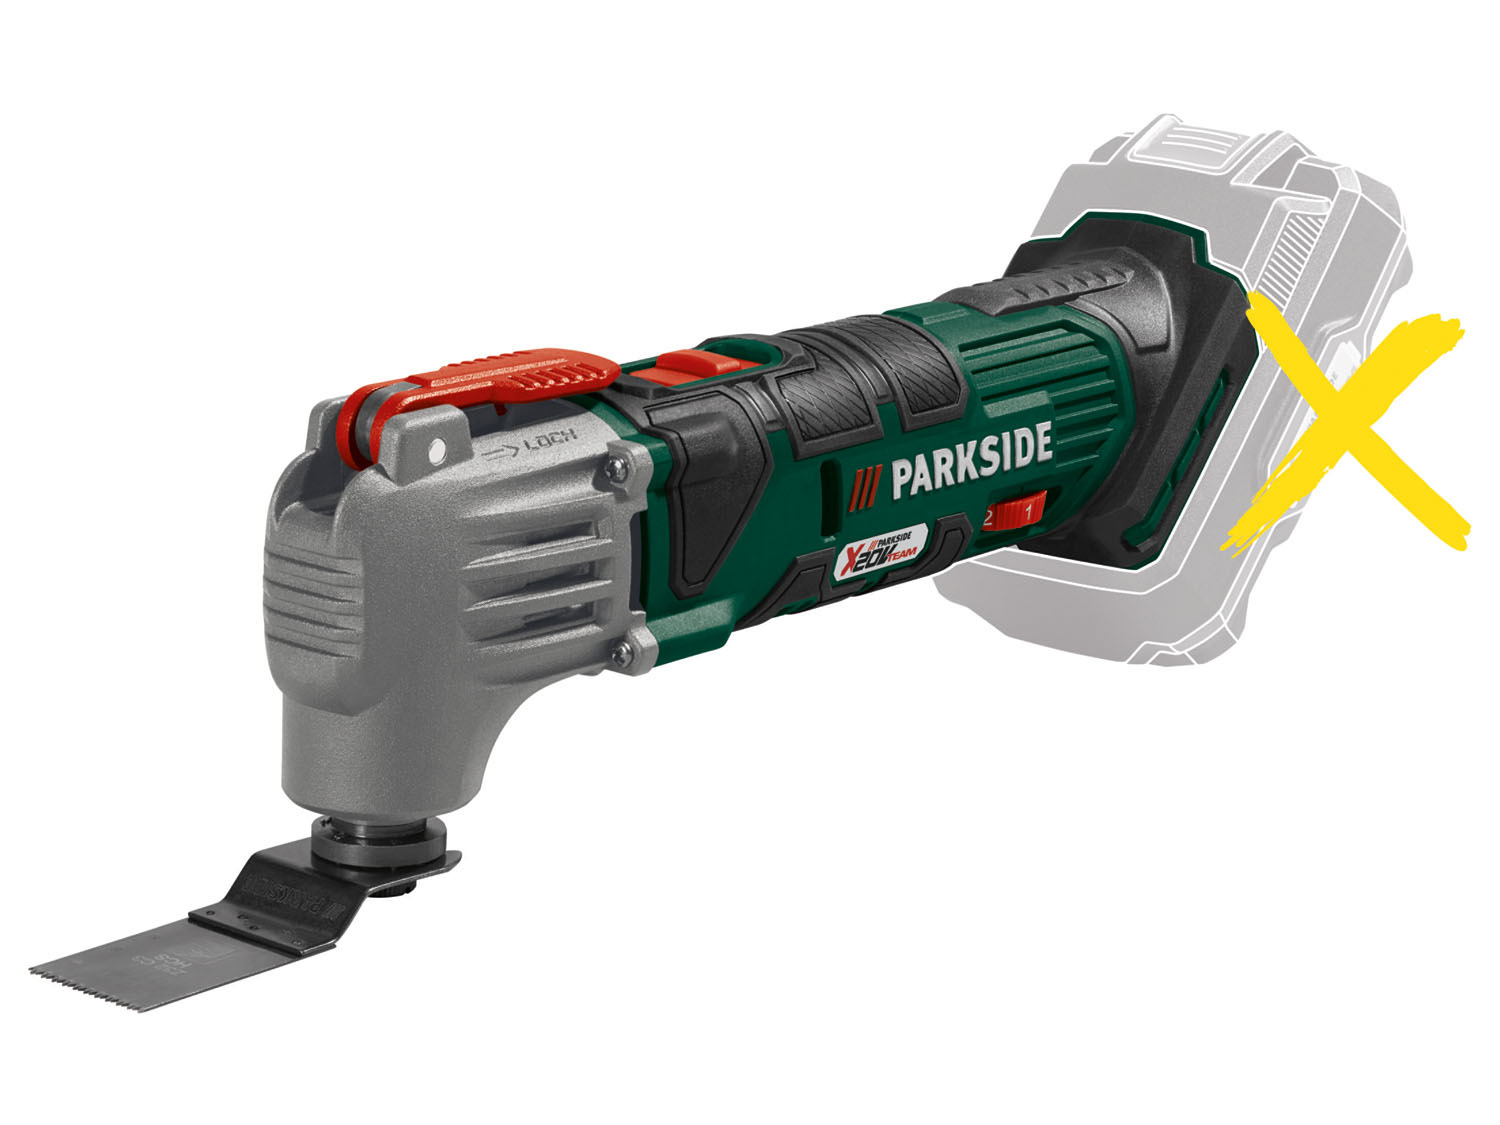
Ok,I managed to find a way to remove a fag bb with very weak plastics in 20 mins. Only using a multitool.

I used a very slim iron saw on the multitool. I first cut of the edge of the outer ring. Then I have put the saw in the plastic and pushed it to the inside until there was no more pressure (middle of the bracket). I went completely round the ring until it was completely loose. Then I did the other side of the bracket. By then I could pull out the bracket and remove the remaining plastics.

The iron saw also melts the plastic as it cuts loose.

I believe this is a much faster method than those above. But do make sure you put the saw inwards to not damage the inner part where you want to mount the new bracket.

enter image description here

Your Answer

By clicking “Post Your Answer”, you agree to our terms of service and acknowledge you have read our privacy policy.

Not the answer you're looking for? Browse other questions tagged or ask your own question.