4

Usually I apply handlebar tape from the outer ends of the handlebars inwards. (There is an alternative slightly better way requiring more work and estimation where the handlebar tape is begun from the middle at the brake levers and wrapped to both directions separately. If beginning the handlebar tape from the inner ends and going outwards, the end plugs or bar-end shifters can act as the retention mechanism.)

This from-out-to-inwards taping job leaves the inner end of the handlebar tape vulnerable. Handlebar tapes usually come with a short piece of "end tape" that is similar to adhesive electrical tape. Almost always, the adhesive is insufficient to prevent it from unraveling. The best end tapes I have used might last perhaps a year and then they unravel, the worst end tapes last only few minutes and then they begin to unravel.

How to best ensure the end tape doesn't begin to unravel?

3
  • 1
    why don't you start from the inner ends?
    – njzk2
    Commented Aug 22, 2021 at 16:01
  • 6
    Because starting from center puts the tape's exposed edge against the direction the hands tend to slide. Sliding against the grain tends to unwrap or curl the tape.
    – ojs
    Commented Aug 22, 2021 at 16:48
  • ESI Grips makes a silicone tape that I think is awesome. Commented Aug 25, 2021 at 2:43

7 Answers 7

16

I use high quality electrical tape (such as 3M Super 33+) to mechanically hold the bar tape in place. Over top of that, I use the provided finishing tape, which usually matches the bar tape better aesthetically and also hides the ugly electrical tape wrapping.

If the finishing tape starts peeling up, a little contact cement will fix that.

5
  • 3
    I personally prefer 3M's vinyl tape sold as something like "Mending and repair tape". I've never had it come unwrapped. I usually don't even bother with the finishing tape that comes with the bar tape. They're all black for me anyway... Commented Aug 23, 2021 at 0:01
  • 1
    I also use electrical tape but I’m wondering if maybe cotton tape (as used for climbing to tape injured fingers) might actually feel and work better. Electrical tape tends to get very soft in warm weather. My Fizik bar tape actually came with cotton finishing tape which holds up nicely.
    – Michael
    Commented Aug 23, 2021 at 5:34
  • @AndrewHenle From what I can find, that repair tape is clear. Won't look very good in my aesthetic opinion
    – MaplePanda
    Commented Aug 23, 2021 at 5:48
  • @Michael I'm not familiar with the climbing tape, but from a cursory bit of research it seems pretty good. Haven't had problems yet with the 3M electrical tape though. The cloth tape would match fizik's microtex material. I'm currently experimenting with AliExpress bar tape though, so it does sound a bit too fancy...
    – MaplePanda
    Commented Aug 23, 2021 at 5:53
  • The cotton tape is just a step away from bicycles.se classic hockey tape. Usually it's recommended for wrapping the whole bar, though.
    – ojs
    Commented Aug 23, 2021 at 6:06
9

You are correct that many stock finishing tapes have relatively weak adhesive and are mainly decorative. In my experience, if you wrap the bars tightly and you maintain roughly even tension on the tape while wrapping them, the tape should not unravel. (Also, if the tape does unravel, it can be possible to unwrap it carefully and redo the job, assuming the tape is a decent quality.)

In the past, I had preferred to use electrical tape to secure the inner end, then wrap the finishing tape over the electrical tape. The suggestion to use self-amalgamating tape is a good one; I recently came across this tape and it does work. "Self-fusing silicone tape" tape may be a synonym. Either phrase currently returns a large number of results on the US Amazon.com store. I don't agree that you should necessarily use the provided finishing tape on the inside, then wrap that in self-fusing tape. I'd rather use that type of tape as the base or sole layer of tape.

I will note that wrapping your handlebars is an acquired skill, and many cyclists might only face this process once a year or less, depending on how much they ride. The opportunities to practice are less. It is definitely worth thinking about asking your local bike shop to do it, or to invest the time to buy one or two sacrificial rolls of tape to practice on your own. Also, in my experience, thicker bar tapes can be challenging to wrap. Currently, I can do a good enough job with a standard thickness tape, although I lack the skill to do the finishing cut cleanly. Thick tapes tend to defeat me (e.g. the 3+mm Lizard Skins tape or similar; these tend to be oriented at gravel riding for vibration damping).

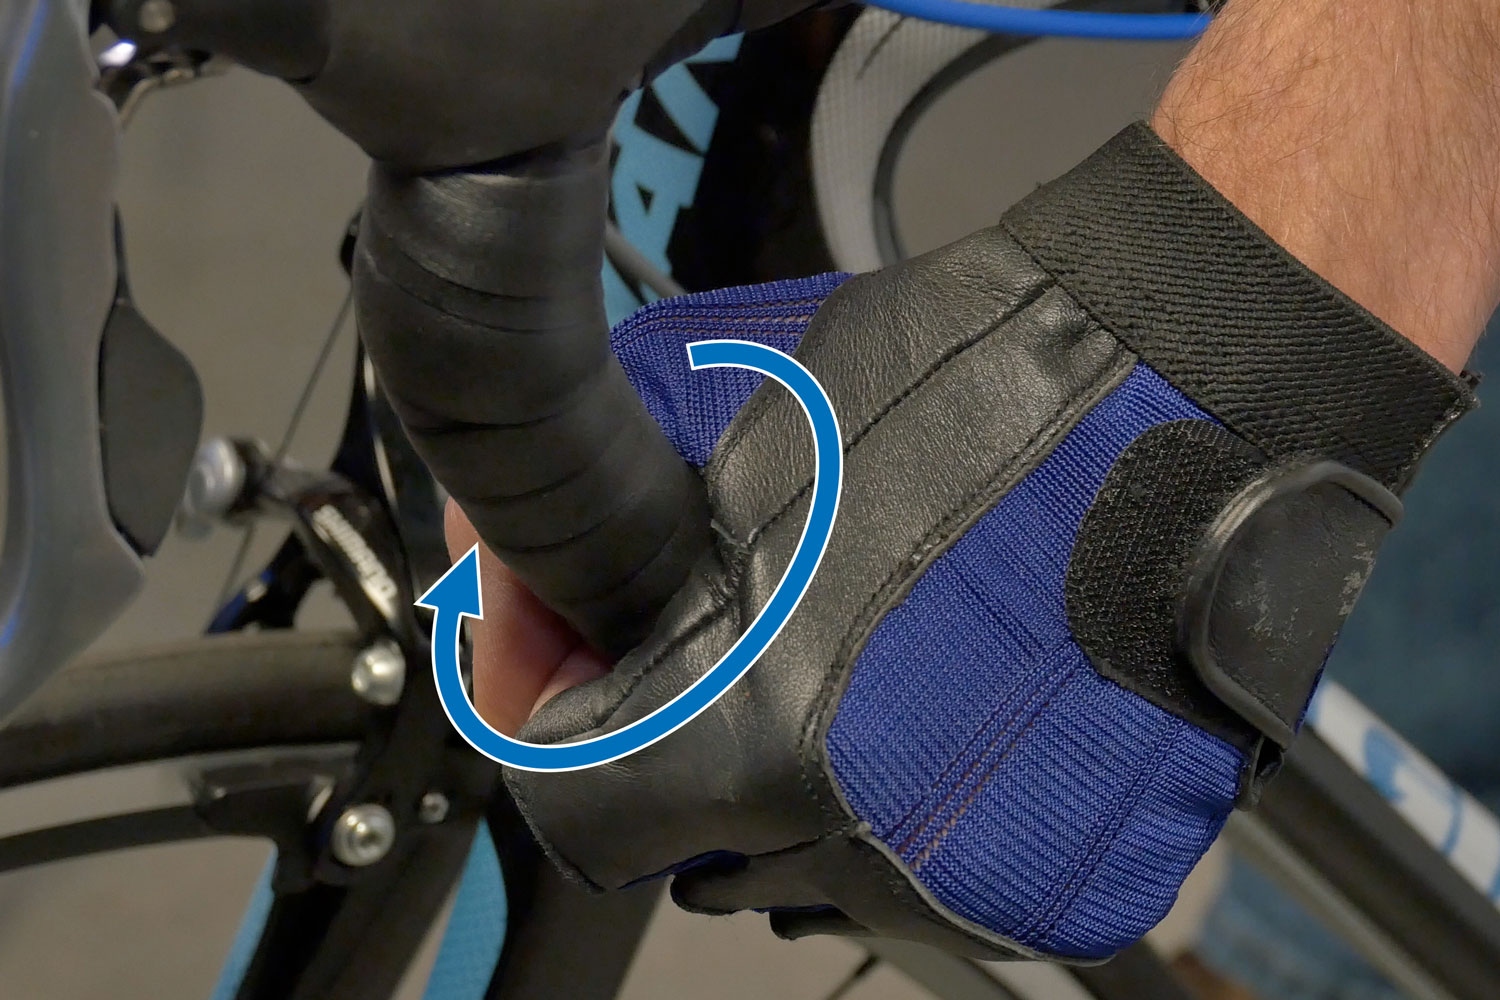
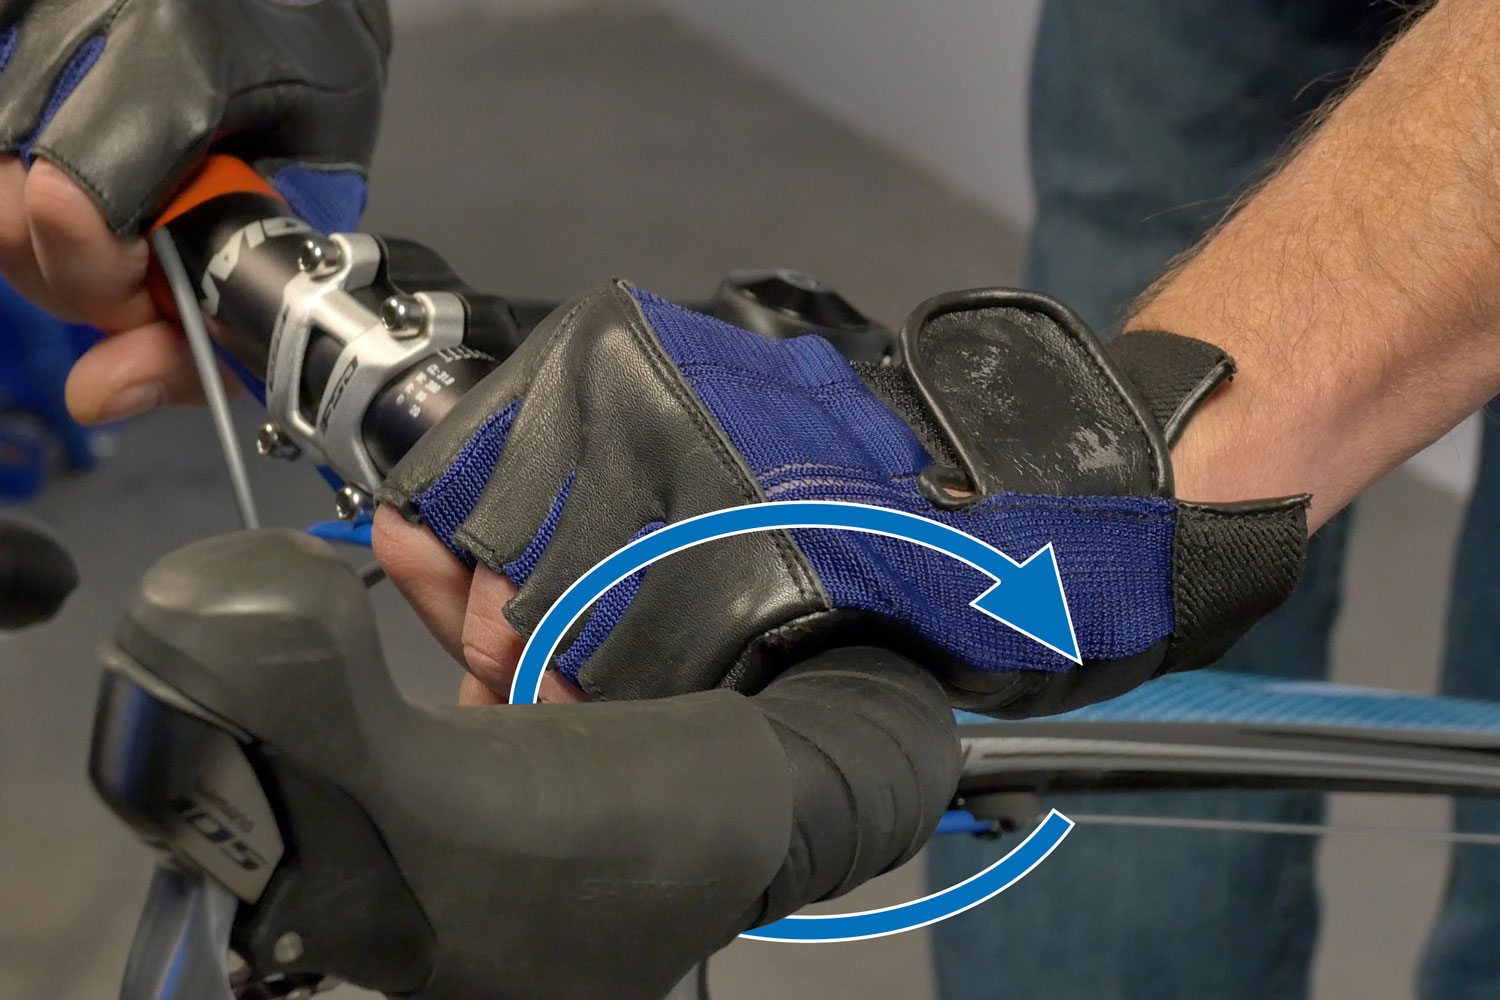
Park Tools suggests that most riders tend to rotate their hands a certain way under hard efforts, e.g. outward on the drops, or towards themselves when on the tops. The pictures below, from their link on handlebar taping, illustrate.
enter image description here enter image description here

You can wrap your bars such that the tape goes in the same direction as our hands tend to rotate. Thus, we will tend to tighten the tape as we ride, rather than loosen it. In particular, this is why most taping guides tell cyclists to start wrapping from the ends of the drops and to wrap outwards.

I personally have preferred a figure 8 wrap around the levers. If you do this, I believe it's impossible to have the bar tops wrapped in the preferred direction. In my experience, if you wrap the bars tightly and the adhesive is decent quality, I believe the tape should generally not unravel on the tops. Still, the figure 8 wrap is a traditional technique that originated when bar tape was thinner, so it may not be necessary.

1
  • Some brands of high quality tape can even be unwound and rewound several times when taking adequate care.
    – Carel
    Commented Aug 23, 2021 at 13:35
6

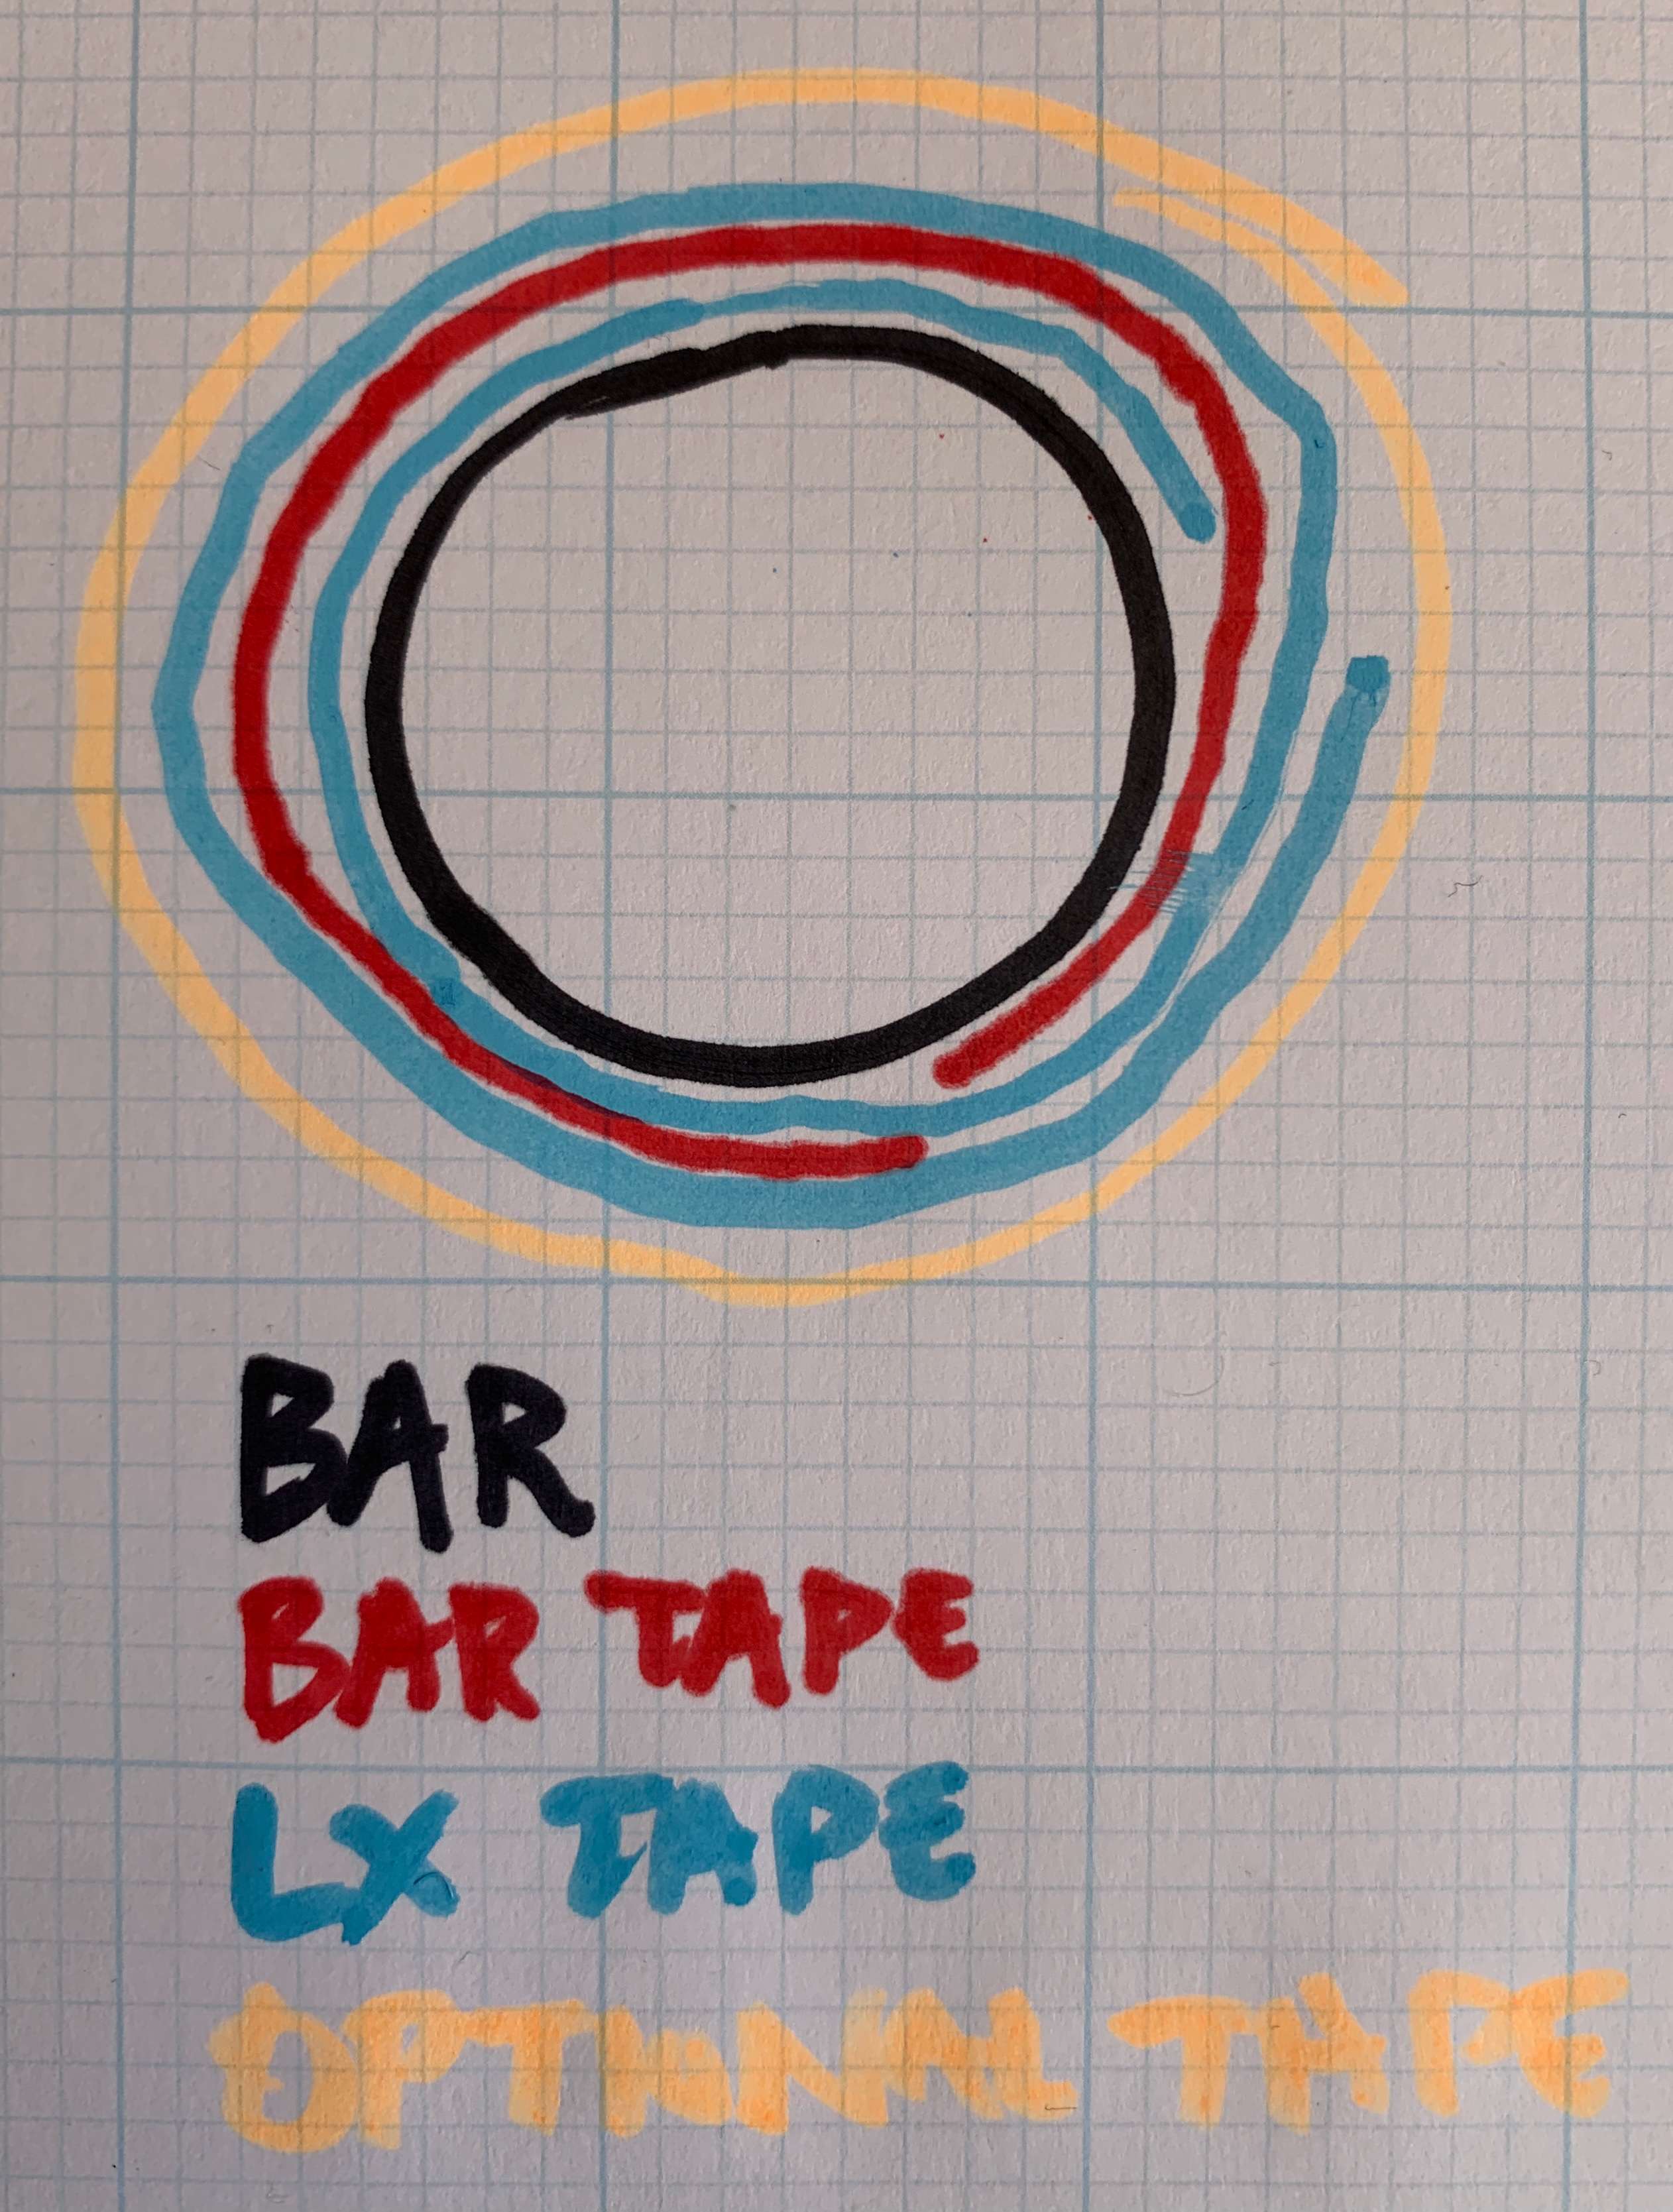
My wrapping technique is using electrical tape, however I split it in half width ways along its length first. Usually by rotating the roll next to a Stanley blade or similar - both resting on a hard surface.

Next, I actually start wrapping the electrical tape around the bar before the bar tape fully goes around, this way it has a solid 'reference' and is less inclined to unravel. Think of the bar tape being eventually sandwiched between two bits of tape kind of chasing each other around the bar. The electrical tape can even start first (certainly ends last).

If you don't like the thought of a little tape adhesive residue after cutting the (tensioned) tape you can do a final untensioned wrap in the opposite direction, which locks it all in.

Looks good, never comes undone, easy to unwrap ... etc. etc.

enter image description here

2
  • That looks like something to try out.
    – Carel
    Commented Aug 23, 2021 at 13:37
  • +1 for the hand-drawn red circle! :) Also, looks like a good idea.
    – FreeMan
    Commented Aug 23, 2021 at 17:08
4

Not all finishing tape is the same. I often ignore what's provided and just use electrical tape, but the latest bar tape I bought (own brand from a shop where I was ordering something else) came with some almost rubbery finishing tape that seems good so far.

The vinyl finishing tapes with no stretch at all are the worst type.

When using electrical tape, one thing is a big help: wrap tightly, stretching it, except for a final turn unstretched, and cut on the underside. This works well even on thick bar tapes (but when I double-wrapped the underneath wrap was shorter, so I haven't tested it on double-wrapping)

3

One hack is to fit an accessory clamp such that it secures the inner-end of the bartape.

Of course this doesn't help if you have aero/non-round bars, or don't want a front light or bike computer mounted that way.

On the plus side, using the clamp this way gives you more grip to stop rotation, and dual use from a single item which is always nice.

2

There are few ways, one of them I have used previously and few I just invented now.

One possibility is to use a hot soldering iron to melt the end tape to cause it to fuse to itself. However, this approach has several problems:

  • It is very hard to estimate the contact time of the soldering iron with the tape, even if the soldering iron has a thermostat for soldering temperatures because soldering temperatures are very hot. A split second too short contact time causes insufficient heating and unraveling. A split second too long contact time burns a hole into the end tape, making it ugly. If using an adjustable temperature soldering iron, it may be possible to make the job easier by using the lowest possible temperature setting.

  • If a soldering iron is used with plastic, its tip is "contaminated" so using it afterwards may cause it to smell bad. I'm not sure if the little plastic residue on the soldering iron tip is a problem if using the soldering iron afterwards for its intended role of soldering electronics.

  • You must wait for the soldering iron to reach its proper temperature. If you remember to start heating of the iron before beginning the taping job, then obviously it is likely hot enough after the taping is done and the ends need to be finished.

  • Most soldering irons are not cordless so an electrical outlet needs to be nearby. Usually the cord is too short for this.

I finished one handlebar taping job with the soldering iron trick and I wasn't satisfied due to the above mentioned problems although I managed to durably fuse the end tape to itself.

Another possibility that requires removing and reinstalling the brake levers is to ditch the end tape and use a short heatshrink tube of proper diameter and either hot air gun or soldering iron (in this case you don't need to touch it with a soldering iron, mere proximity of a hot iron is enough to shrink it) to cause it to shrink. The problem of this approach is that brake levers need to be removed, requiring extra labor -- and if you reinstall the brake levers, they are invariably at a different location unless you mark their positions to the handlebars.

The best way I was able to come up with is to use self-amalgamating tape around the ordinary end tape. It is a type of electrical tape with no adhesive surface. You cut a piece of the tape that can wrap around the handlebars two times over, and then stretch it to about two times its original length (so now it can wrap around the handlebar four times over). The stretching activates the self-amalgamating property. Then, you wrap the stretched self-amalgamating tape around the ordinary end tape. Gradually the self-amalgamating tape starts to fuse to itself, and over time, it should become durable so that it never unravels.

If using the self-amalgamating tape, it's probably best to not solely rely on it but rather use the ordinary end tape with adhesive surface inside it, so that the adhesive can do its job and the job of the self-amalgamating tape is to only prevent the adhesive tape from unraveling.

1
2

A couple of suggestions.

The first being the most simple and a technique I've used on hundreds of projects to button up loose ends or fraying rope. See if you can source a large enough diameter heat shrink tubing or use this product and boom, done.

Second, try out a waxed thread whip tie end. The wax does a few things including waterproofing, rot resistance, and mitigates loosening due to extra cohesion.

Third, get fancy with a French Hitching/French Whipping knot.

Fourth, get into the fine art of coxcombing which can be done to the entire handlebar or just the areas you want to button up.

5
  • 4
    The fourth link appears to require a hole drilled through the handle. I don’t think that’s advisable on most bicycle handlebars. They need to bear the load of the rider’s hands and upper body when the bicycle hits a bump. Also, if you’re on the hoods or drops, there’s a long lever arm from there to the point where I assume you’d drill the hole.
    – Weiwen Ng
    Commented Aug 22, 2021 at 20:47
  • Heatshrink is awesome on flatbar grips - downside of using it to secure drop bars is getting the ring in place... you have to drop the brifters off to do so, which means pre-planning.
    – Criggie
    Commented Aug 22, 2021 at 20:48
  • @WeiwenNg I believe you saw 4 frames of the video and made an assumption that a hole is in any way necessary to apply coxcombing. I assure you that zero holes are required to apply the coxcombing technique. In fact its found as decorative hand rail and ladder art on US NAVY war machines worldwide and I guarantee drilling holes in a handrail or ladder for sea duty war ships wouldn't be allowed! Please watch the video in its entirety to see no holes are required for that!
    – Sn3akyP3t3
    Commented Aug 24, 2021 at 1:37
  • You're correct. I did actually watch to the end, but I skipped several frames so I didn't see that the person wasn't threading through the hole. Hence, my first comment is invalid. Leaving it up for now to demonstrate that nobody's perfect.
    – Weiwen Ng
    Commented Aug 24, 2021 at 13:19
  • @WeiwenNg I could have picked a different video where the item being wrapped wasn't scrap wood.
    – Sn3akyP3t3
    Commented Aug 30, 2021 at 21:29

Your Answer

By clicking “Post Your Answer”, you agree to our terms of service and acknowledge you have read our privacy policy.

Not the answer you're looking for? Browse other questions tagged or ask your own question.