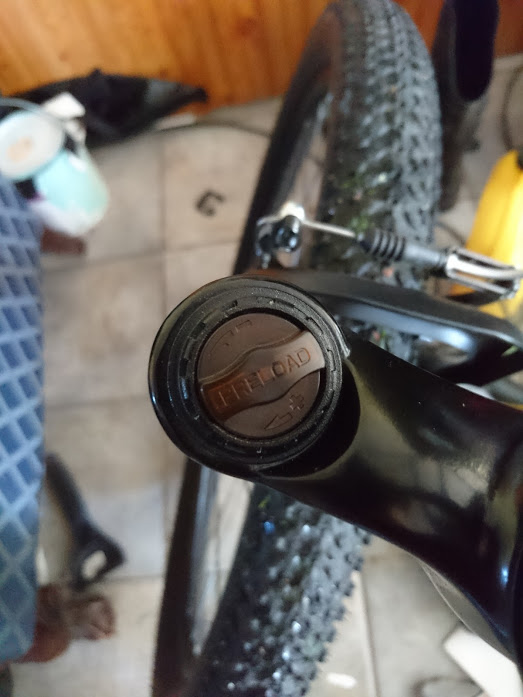
I recently got into mountain biking, however, I realized that my front suspension would not dampen or even move when I got on it, only hard movement down would actually move it (but not by much). So I decided to find a way to adjust it so I checked out how to adjust a preload, apparently, there should be a click when you turn it and then it should dampen or make the suspension harder, but when I turn my preload cap it's very hard to turn and doesn't make any sound when I turn it. Does anyone know how to solve this issue as I would like to get as much out of my bike as possible.
-
1If it’s a new bike just take it back to where you bought it and get it fixed or replaced. If you bought used we need to know what model of fork you have to be able to help. If you don’t know including photos of the bike and fork will help.– Argenti ApparatusCommented Oct 5, 2019 at 13:59
-
Included picture of the cap, the suspension is Haro HL389 / 80MM Travel, and the actual bike itself is a Haro Flight Line One– LuckyCommented Oct 5, 2019 at 14:51
2 Answers
Lockout
Looking up the HL CH-389 fork shows that it can have a lockout lever, which will stop the fork being able to compress if it is on. I can't see a lockout lever in the specs or pictures of the Haro Flightline One but I may not be looking at your exact version/year.
So my first step would be to check on top of the other fork leg to see if you have a lockout lever, and if you do have one then make sure it's not in the lockout position. If you are unsure if it has lockout then post a picture of the top of the other fork leg.
Fork Problem
The other reason the fork may not compress easily could be it needs a service or the fork is faulty or damaged. But a bike shop should be able tell you if the fork is performing as it should just by trying it.
Preload
Often preload adjusters do not click, so I would not worry if it doesn't click when you turn it. Damping adjusters (rebound for example) will usually click but they are a different adjuster for a different purpose.
At the moment you don't know what the preload is currently set to so you can't be sure if it's already set to maximum or minimum.
To check if the adjuster is working and see if you are at either end of the limits you should try turning it both directions and see which direction(s) it will turn in. If it will turn only in one direction or is a lot easier to turn in one direction from where it is now then it's likely you are at one end of the adjustment limit.
It should turn relatively easily when not at either end of its range, especially when turned anti-clockwise as reducing preload is easier than adding preload (when adding preload you are compressing the spring which makes it harder to turn).
If you get it turning, you can then work out what the maximum and minimum are, most preload adjusters will have a range that's multiple full turns, something like 3-5 turns from min to max.
If it's very stiff to turn in both directions and does not get easier at all then the adjuster may be the problem. This can be serviced as per Jeff's instructions or replaced if the part is available.
Preload adjustment is fine-tuning and may not dramatically change how hard/soft a fork is. If you need more adjustment than the preload provides you would need to look at changing the spring weight in the fork.
On these types of forks, the dial part will stop turning at the extreme ends (full + or full -) of the preload range. What happens is that there is an inner, 2-3 inch, threaded plastic cylinder that moves up or down on the matching threads of the outter cylinder. The top of this outter cylinder is the splined aspect of the top cap. The top of the inner cylinder is the dial. Beneath this cap assembly is the spring assembly. Preload is the effect of the inner cylinder pressing down on the spring, partially compressing it which makes the fork firmer. Perhaps you are at one end of the extremes? You can take an adjustable wrench or pair of pliers get hold of the dial and carefully try to turn it one way then the other. If you can, try to turn this fully left (-). To take the cap assembly off for inspection and maintenance use Locking pliers or appropriate sized socket (20 - 24 mm) to engage the splines of the external cap and unthread the entire cap assembly. Check for breaks or severe contamination with dirt or sand. Below the cap, check spring for anomalies like corrosion, breaks or damage to the walls of the stanchion. If no obvious problems are found, clean and lubricate the parts and reassemble.

